Pages

Sunday, 17 April 2016

EASIEST CHOCOLATE CUPCAKES EVER !!!

These cupcakes are SUPER moist, SUPER chocolate-y and SUPER easy to make. They also stay moist and soft for two or three days (at least).

Perfect for a potluck, bake sale, lunch box or "just because". They are easy enough for kids to make too !!!


CUPCAKES

1/2 cup butter cut in cubes
1/2 cup water
1/4 cup unsweetened cocoa powder
2 cups flour
2 cups sugar
1 teaspoon baking soda
1/4 teaspoon salt
1/2 cup buttermilk (see note below)
2 eggs
1 teaspoon vanilla

Note: If you do not have buttermilk, just put 2 teaspoons of vinegar or lemon juice in a half-cup measuring cup then fill it up with milk. Let it sit for 5 minutes.........works just as well as buttermilk!!

Preheat oven to 350� and put 24 cupcake papers in cupcake pans.

Bring butter, water and cocoa powder to a boil, then take off heat and set aside to cool a few minutes.

Mix flour, sugar, salt and baking soda. Add eggs, buttermilk, vanilla and warm cocoa mixture and beat just until well blended.

Fill cupcake papers 2/3 full and bake for 18-20 minutes. My electric oven takes exactly 18 minutes. Do not over-bake!! Cool before frosting.


FROSTING

6 tablespoons milk
1/4 cup unsweetened cocoa powder
1/2 cup butter
4 1/2 cups powdered sugar
1 teaspoon vanilla extract

Heat the milk, cocoa powder and butter to a boil, then remove from heat then add the vanilla and powdered sugar. Beat till smooth.

Sometimes I have to add a tablespoon or so of extra milk to the frosting (if it seems too thick).

If frosting seems a little too SOFT, just let it cool for about 10 minutes or so and it will thicken up nicely.


ENJOY !!!
?

Sunday, 3 April 2016

MEATBALL SUBS

Whether you make this on the cook top, or in a crockpot (see directions below), this meatball sandwich is heavenly!! It is rich, satisfying and total comfort food....so, live a little and ignore the calories this weekend!!

The aroma of these meatballs, simmering in the sauce, will pull(even the pickiest eaters) from all corners of your house.

For the full size sandwiches, use hoagie rolls, or for a crowd, small dinner rolls make great meatball sliders!!


Make sure you click on this photo
to see all the yumminess in this sandwich!!?


This recipe will feed a crowd, so if you are just feeding the family, cut the meatballs in half. Better yet, make the whole recipe and mix the leftovers with pasta and Parmesan tomorrow night!! I love "day two" recipes.

MEATBALLS
2 pounds of lean ground beef (90% lean)
1 cup dry breadcrumbs (toasted under broiler)
4 tablespoons fresh parsley (minced)
2 cloves minced garlic
1 cup chopped onion
2 eggs
2 teaspoons salt
� teaspoon black pepper

Saute chopped onion and garlic in a tablespoon of olive oil, until the onions have mellowed and become a little sweet. Mix them in with all of the other meatball ingredients. Form into 2� meatballs and place on a cookie sheet (that has a rim) and bake at 350� for 15 minutes. Remove from oven and drain. Set aside.

SAUCE

Even if you cut the meatball ingredients in half...do not cut the sauce in half. You can make this sauce on the range or in the crockpot.

In large deep pan, saute  1/2  cup chopped onions and 1 clove garlic in one tablespoon olive oil, until the onions are translucent, and then add:

(1) 15 ounce can of tomato sauce
(1) 12 ounce can of tomato paste
4 cups of water
1 teaspoon of dry oregano
2 teaspoon of dry basil
1 teaspoon of salt
1 tablespoon of sugar
1/2  teaspoon of black pepper
1/2  teaspoon of fennel seed
1/4  teaspoon of dry red pepper flakes

Bring to a boil and stir to thoroughly mix everything. Reduce heat to a simmer and add the pre-cooked meatballs to the sauce. Simmer for 2 hours (or see crock pot directions below).

TO SERVE: split your bread roll and put just a skim of butter on the cut side and toast it (for just a minute or so) under the broiler. Remove and load with meatballs and mozzarella cheese and put back under the broiler to melt the cheese. Enjoy!!


CROCKPOT DIRECTIONS

The recipe ingredients are the same, except use 4 cups of HOT water and crockpot on HIGH for 5 hours.

CROCKPOT TIP
Lay a dish towel over the crockpot lid (to insulate it a little, so it will come to a simmer quicker). Once it comes to a simmer, remove the towel and crack the lid open just a little bit so that the sauce will reduce a little.

NOTE: The secret to this recipe is the length of cooking time - NO SHORTCUTS ON THE COOKING TIME......that's the secret. 

The meatballs taste AND texture will be SO MUCH BETTER if you cook for the full amount of time, that's why the crock pot is the perfect method to make these sandwiches.

Saturday, 26 March 2016

"HARD BOILED" EGGS FROM THE OVEN

There is nothing tricky about boiling eggs for Easter, but there are ALWAYS those eggs that crack as they boil, or the phone rings and you forget the eggs on the stove (and they overcook and  get those green "rings" around the yolks, etc.)  Not a big deal, but it can be a hassle when you are preparing for a crowd.

This oven method, of cooking eggs in the shell, is not only fool proof, but the eggs come out absolutely perfect and you can make a ba-jillion at once!!

 
Preheat your oven to 350 and place large size eggs in a mini-muffin pan (large end down). If you don't have a mini-muffin pan, you can use a regular cupcake pan  (they they will just roll around a little more).

How long you bake the eggs depends on the size of eggs you use and how hot your oven runs. I used large grade A eggs and cooked them for 25 minutes.  If you are concerned about it, just run a "test egg" to gauge how long to cook them.

When the eggs are done, use tongs to put the eggs into a bowl of ICE water (for 10 minutes) to stop further cooking.

NOTE: After the eggs are cooked, you MIGHT find SOME eggs that have brown speckles on them, but don't freak out; these little specks will dissolve when you put the eggs into the ice water. The next photo is before and after the ice water bath.

Not only is this a great way to cook Easter eggs in bulk, but the eggs are delicious!! The yolks are bright yellow and the whites are very tender (not rubbery like boiled eggs can produce).?

Where has this cooking method been all my life!?!?


Thursday, 24 March 2016

RITZ PEANUT BUTTER CHEESECAKES

If you are looking for a quick and easy (but super tasty) dessert recipe, this is it: Mini peanut butter cheesecakes, using ingredients you probably already have in the pantry. 

The easy-peezy crust is simply 2 Ritz crackers (per cheesecake) sandwiched together with a thin skim of peanut butter. The filling mixes up in seconds and two hours after they are baked, they are ready to devour!!


16 ounces regular cream cheese (room temperature)
1/2 cup sugar
1/2 cup peanut butter (creamy style)
1/2 cup sour cream
1 teaspoon vanilla
2 eggs

Beat the room temperature cream cheese until it is smooth
and creamy (30 seconds or so).

Add the sugar, peanut butter, sour cream and vanilla and beat until well incorporated. Add the eggs, one at a time, and beat until everything is well mixed but don't overbeat.

Line a cupcake pan with paper liners, then sandwich two Ritz crackers together with a little peanut butter (spreading to the edges) and put it in the bottom of each paper liner.

Spoon the filling onto the cracker crust (filling about 3/4 full).
Top with a sprinkle of crushed Ritz crackers.

Bake in preheated 275� oven (recipe said 22 minutes but my electric oven took 27 minutes).

Cool to room temperature, then chill for 2 hours. Makes 20-24 depending on how full you make the paper liners.


Monday, 22 February 2016

PORK AND PINTOS IN GRAVY

This recipe is TOTALLY EASY + TOTALLY DELICIOUS COMFORT FOOD!! Fork-tender pork tenderloin with pinto beans, spicy gravy (the "gravy" is pure gold!!) and it all cooks together in the crock pot!!

I like to serve this over rice, but it is equally as tasty stuffed into warm flour tortillas, or over a bed of tortilla chips and smothered with cheese, avocado and sour cream; it has ENDLESS leftover possibilities (which is a very good thing)!!

I like to use a 2 pound pork tenderloin, because it is nice and lean, but any 2-3 pound pork roast will work.  My crock pot is a big one and it tends to run a little hot, so this pork is fall apart tender (for me) in 6 hours ON THE LOW SETTING. Depending on your crock pot, it could take as many as 8 hours on low, but that is unlikely, just start checking for tenderness at 6 hours.


2 pounds (roughly) pork tenderloin
1 1/2 cups DRY PINTO beans (rinse, but DO NOT soak)

(1) 4 ounce can of mild green chilies (I use Ortega)
3 teaspoons chili powder (see note)
2 teaspoons ground cumin

2 teaspoons salt
1 teaspoon dry oregano
1 clove garlic minced
1 cup chopped sweet onion
healthy pinch of dry red pepper flakes (optional see note)


Brown the pork well and put it in the crock pot. Saute the onions and garlic in the same pan and then mix them with the DRY beans, spices, canned chilies then pour over the meat. Add just enough water to mostly cover the beans and meat, it should look like this:


Make sure the liquid gets under the meat as well. After cooking on low for a few hours, check the liquid level in the crock pot and add a little more water if necessary, but not TOO much. THIS BROTH MAKES THE BEST-BEST-BEST RED GRAVY!!
 
Take the meat out of the crock pot after 5-6 hours or when it gets fork tender  (remove any fatty pieces and bones) and pull it apart. Thicken the liquid in the crock pot with a cornstarch and water slurry, then put meat back in with the beans and gravy. 


VARIATION: The beans in this recipe make OVER THE TOP delicious re-fried beans. Just fish out the beans and put them in the food processor with a little bit of the liquid. You'll never buy canned refried beans again!!?

NOTE: A word about the heat or spice in this recipe. My hubby doesn't like very much (hates) "heat" in his food. He likes strong flavors, he just doesn't like "fire" as he calls it. I use a very small pinch of dry red pepper flakes when I make this for him. If you like a little more "fire", just up the dry red pepper flake ingredient.

NOTE: If I'm making this for children, I back off the chili powder to 2 teaspoons and omit the chili flakes.

ENJOY !!!?


Wednesday, 16 December 2015

EASY RASPBERRY UPSIDE-DOWN CAKE

This quick and easy recipe comes from bettycrocker.com.  It is an excellent recipe to have in your "Company is coming last minute" recipe file. Served warm with ice cream, it is always a hit for breakfast OR dinner.


The original recipe called for 1 1/2 cups of fresh raspberries. Well, I don't know about you, but I seldom have fresh raspberries laying around my house, but I DO have frozen raspberries, so when I make this, I use a whole 12 ounce bag of frozen red raspberries in this recipe.

1/4 cup butter
1/4 cup sugar  (I use 1/3 cup)
1 1/2 cups fresh raspberries (I use 12 ounce frozen raspberries)
2 tablespoons sliced almonds (I leave out)
1 1/2 cups original Bisquick mix
1/2  cup sugar
1/2 cup milk
2 tablespoons vegetable oil
1/2 teaspoon vanilla  (I use 1 teaspoon)
1/2 teaspoon almond extract
1 egg

Preheat oven to 350�. Line the bottom of a 9" round cake pan with parchment paper and then spray the pan and parchment with cooking spray.

Mix 1/4 cup sugar (I use 1/3 cup sugar here) with 1/4 cup melted butter and pour over the parchment paper.

Next arrange the raspberries evenly over the butter-sugar mixture. Sprinkle with almonds if you are using them.

In medium mixing bowl, beat the Bisquick mix + 1/2 cup sugar + 1/2 cup milk + vegetable oil + extracts + egg, with an electric mixer on low for 30 seconds, scraping sides of bowl.

Beat on medium speed for 4 minutes, scraping sides of bowl. Pour over berries.

Bake 35-40 minutes or until a toothpick in center tests clean. Immediately place heatproof serving plate, upside down over baked cake; turn plate and pan over.

Important: leave pan over cake for several minutes so that the sweetened berry layer can drizzle over cake.

Remove pan and cool at least ten minutes before serving.  Serve with whipped cream or ice cream.  Store cake loosely covered.

NOTE: If you are using frozen raspberries, do NOT thaw them out, just put them in the microwave for about 15 seconds or so, so that they will be loose and workable, then proceed as if you were using fresh raspberries.

NOTE: I drizzle a light vanilla frosting glaze over the berries, but that is completely optional.  I don't have a recipe for the glaze, I just mix a little melted butter, a little powdered sugar, a little vanilla and a little milk, then whisk it together and drizzle over top.


Wednesday, 25 November 2015

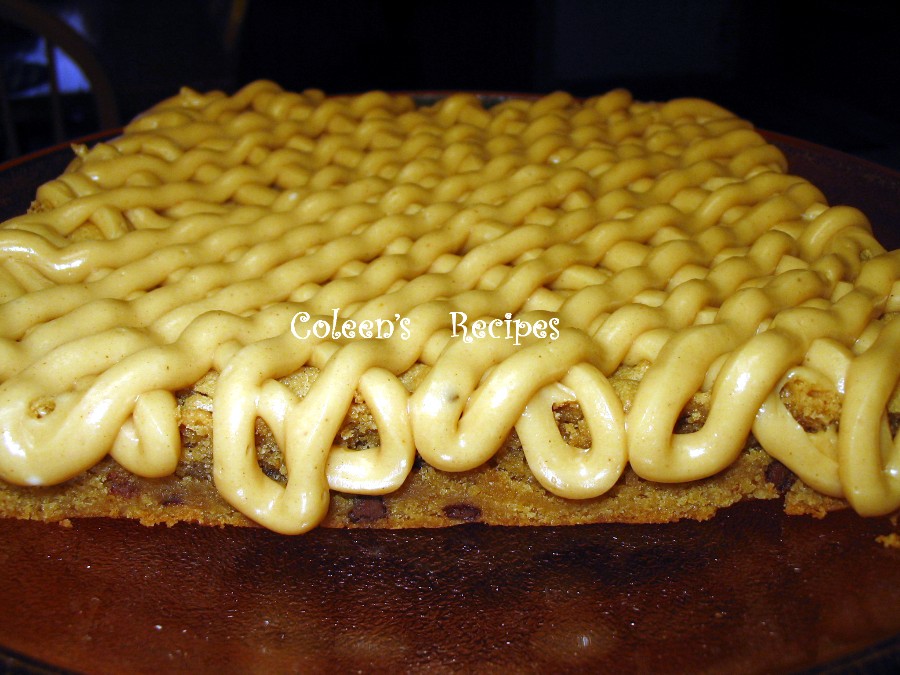
PEANUT BUTTER BROWNIES

This is, by far, the best peanut butter brownie recipe I've tried. It is quick and easy and has a FIVE STAR peanut butter-honey frosting. We can't seem to stop snacking on it!!


PEANUT BUTTER BROWNIES
1/2 cup creamy peanut butter (I use Jiff)
1/3 cup butter at room temperature
2/3 cup granulated sugar
1/2 cup brown sugar
2 eggs
1 teaspoon vanilla extract
1 cup flour
1 teaspoon baking powder
1/2 teaspoon salt
1/3 cup mini-chocolate chips (semi-sweet)

Preheat oven to 350�F. Grease a 9 x 9 baking pan (personally, I do not grease, I use parchment paper instead.

By hand or mixer, cream the peanut butter and butter till smooth. Add brown sugar and white sugar, eggs and vanilla. Beat until smooth.

In a small bowl, mix flour, baking powder, salt and chocolate chips.
After it's all mixed together, add it to the peanut butter mixture and mix just until well combined, don't over mix.

Spread evenly in parchment lined pan and bake for 25 minutes or until top springs back when you touch it. Don't over bake!! You might be tempted to give it an extra 5 minutes for good measure, but don't!!

Cool completely before frosting.


PEANUT BUTTER - HONEY FROSTING
3 cups powdered sugar
3 tablespoons butter
4 tablespoons creamy peanut butter
2 tablespoons honey
3 tablespoons milk
1 teaspoon vanilla extract

Put the butter and peanut butter in the microwave for about 10 seconds to soften them.  Whisk everything together until smooth.

If the frosting seems a little thicker than you want, add an extra tablespoon of milk. If it seems thinner than you want, add an extra tablespoon (or two) of powdered sugar.


Make sure you toss the mini-chocolate chips with the flour, so they don't sink in the batter.?

Friday, 20 November 2015

HOMEMADE TATER TOTS

If you are a tater tot fan, you will adore these homemade tots. If you are NOT a tater tot fan, you WILL be after you try these, they are THAT good!!

It isn't accurate enough to just say these homemade tots are better than commercial tater tots .... it is more accurate to say they are worlds above commercial tater tots, and very easy to make.


2 pounds Russet potatoes
1 tablespoon flour
1/4 teaspoon garlic powder (not garlic salt)
1/2 teaspoon onion powder
1/4 teaspoon oregano
1/2 teaspoon chili powder
1/2 teaspoon salt
1/4 teaspoon pepper
1 cup vegetable oil (for frying)

Wash and peel the potatoes (leave whole) and put them in a pot of cold water on high heat.

 
As soon as it comes to a boil, turn heat down to medium high and boil for 6 minutes (they will not be cooked all the way through).

Remove the potatoes from the hot water and drain on a towel. Cool to room temperature (takes about 30 minutes) (important step).

Grate partially cooked (and cooled) potatoes with a box grater.


Mix the flour and seasoning together. Spread the grated potatoes out a little and evenly sprinkle with four-spice mixture. Gently toss with two forks. The potatoes will seem a little dry, but that OK, it's the way you want them.

Heat 1 cup of oil to 375� (I use my electric skillet) and squeeze a small handful of seasoned potatoes in your hand until you get a nice little nugget. I couldn't get them round, but that's OK.

Fry about 2 to 3 minutes per side, depending on how big or small your nuggets are (don't crowd the tots, just fry a few at a time). Turn them over when they get nice a golden.

Drain on paper towels and sprinkle with kosher salt.

?

Monday, 16 November 2015

BRUSSELS SPROUTS AU GRATIN

This is a wonderful recipe for a special occasion. Roasted Brussels sprouts, cheese and bacon, what could be better?  Even people who aren't sprout lovers, enjoy this easy dish!!


2 pounds small, tender Brussels sprouts (washed and cut in half)
4 ounces of thick cut bacon chopped
1 cup chopped sweet onion (like a Vidalia)
1 tablespoon butter
3 tablespoons flour
1/2 cup chicken broth
1 1/2 cups milk
1/4 teaspoon black pepper
6 ounces Gruyere cheese shredded (about 1 cup packed)

Coat the sprouts with vegetable (or olive) oil and place, face side down on baking sheet. Bake in preheated 425� oven for 20 minutes (turning over about half way through). Remove from oven and set aside.

In frying pan, brown the bacon until crisp, drain on paper towels.

In bacon grease, sautee onions until tender and sweet smelling (about 3-4 minutes).

Drain all but 2 tablespoons of fat from the pan. Sprinkle in the flour and pepper and stir around. Let this gently cook for a minute or so, to cook out any raw flour taste.

Whisk in the chicken broth and milk. Stir/whisk until it's nice and thick, then stir in 1/2 of the grated cheese and stir till melted.

Add the cooked Brussels sprouts and gently toss to coat. Place in greased baking dish and top with the rest of the cheese.

Bake 25 minutes. Let sit for 10 minutes before serving.

?


Thursday, 5 November 2015

MINI BATCH RASPBERRY JAM

This jam calls for TWO ingredients
(yes, two!!)

I make it in tiny batches because we are empty nesters. A 12 ounce bag of frozen raspberries (which will give you 2 cups of mashed fruit) and 2 cups of sugar, that's it!!

No need to thaw the raspberries. Just microwave them long enough to separate them, then mash them with a potato masher and  Measure AFTER they are mashed.

Next, measure out 2 cups of granulated sugar BUT DON'T ADD THE SUGAR YET...... JUST SET IT ASIDE.

Put the mashed berries in a deep heavy pan and quickly bring to a HARD ROLLING BOIL stirring constantly (see important note at end).

Once it's at the hard boil, turn the heat down so that you still have a constant boil, but not boiling crazy hard. Set your timer for 2 minutes, stirring constantly.

At the two minute mark, dump in the sugar and quickly bring it back to HARD ROLLING BOIL again stirring constantly. Turn your heat down to a gentle boil and cook for exactly 4 minutes, stirring constantly.

Remove from heat and skim off any pink foam you might have (I don't usually have any).

That's it!! You're done!!!
You made jam!! 

Pour the jam into sterilized jars and put on the two piece lid and put it through a hot water bath for 10 minutes. If you don't want to mess with the hot water bath, just store the  jam in the fridge.

?
A 12 ounce bag of frozen raspberries and 2 cups of sugar, makes just over 2 cups of finished jam. It is absolutely delicious, fresh and bright tasting, plus it couldn't be quicker or easier.


A note about "hard rolling boil". If you are a new cook, don't let this cooking term concern you. A hard rolling boil is simply a boil that doesn't slow down when you stir it.

My rule of thumb is to bring it to a hard rolling boil quickly, then turn it down to about medium. What you want is a slow hard rolling boil. Does that make sense?  Just don't let it boil crazy hard and you will be ok, just keep stirring.

?

?
?